·
When is an order a custom order?
·
How do I clarify what the client wants?
·
When should I ask for payment?
·
How can I be sure the client will like the
finished item?
When is an order a
custom order?
A lot of my jewellery pieces are created on an ad-hoc
basis. I get an idea (often in the
middle of the night!) and the design develops, usually as I create. However, as I have built up a portfolio of designs
and satisfied customers, I have started to work more on special order items or
commissions. Sometimes, the request is
for an item similar to one I have already made or a slight variation on
something from my gallery. Other times,
the client wants something completely new and may or may not be able to
describe exactly what it is they are after.
Whatever the request, if there is any risk that the client will not be
satisfied with the finished item, I treat the request as a custom order and
follow the process to minimise this risk and give the client confidence in my
service.
How do I clarify what
the client wants?
One I’ve identified a request as a custom order, I need to
get a clear idea of what the client wants.
What is their budget for the piece? This will determine the beads and components I
can use in my design. When do they need it by? No point in designing them a necklace that
needs components shipping from the States, if they need it by the end of next
week! Who is it for? I like to find out a little about the person I
am making for. What age are they? Do
they prefer gold or silver jewellery?
Understated or statement? Do they
prefer modern or vintage style? I ask if
the piece is for a special occasion or to wear every day. I can then choose colours to match a specific
outfit and tailor my design and materials to suit how it will be worn. Oh, and I always ask about sizing for
necklaces and bracelets.
When should I ask for
payment for the order?
Once I have a set of clear requirements (just like those big
IT projects of old!), I select beads and components for the design and
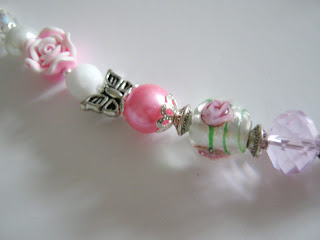
photograph them. Sometimes I might lay
the beads out in a rough design to help the client visualise the finished
piece. I’ll email the pictures to them for their approval and may have to tweak the bead mix or the design a
couple of times until they are completely happy.
 |  |  |
Once they are happy with the design, I will email them a final quote for the work including postage costs. Assuming they are happy with the quote (I have designed the item with their budget in mind after all!), I will ask for payment. So far, all my customers have been happy to pay up front and in full. They have confidence that the item will meet their expectations and that they will be able to have input into the process at every stage.
How can I be sure the
client will like the finished item?
Take a look at the flowchart closely. How many times in the process do I check that
the client is happy? I ask when I’ve
designed the piece, when I’ve prepared the quote, and again, when I’ve finished
the item. I always send the customer
photos of the finished piece before I send it to them. This is another opportunity for them to ask
for small changes to be made. By sharing
a design and component set with them earlier in the process, I‘ve minimised the
risk of having to make major changes at this stage.  |  |
But it doesn’t end there! Once I’ve sent the finished item to the client, I want to know that they are happy with the item they have received. If I don’t hear from them within a week or so, I’ll generally get in touch just to make sure they are 100% satisfied. As yet, I haven’t had a dissatisfied customer but as my flowchart shows, I will always try and rectify a problem (even if it means asking them to return the item for alterations). Positive feedback is extremely valuable to any small business and a recommendation to another potential client is the best reward of all.
Stay in tune with your customer
The process I have described is not set in stone and I will tweak it for each individual client but the basic principles are always there – staying in tune with the customer, making sure they understand the process right from the outset and, keeping them informed of progress regularly. An informed customer is a happy one and a happy customer will help you grow your business!


Thanks for this Helen! This has really helped :] x
ReplyDeleteHelen,
ReplyDeleteI love the flow chart! This is the best representation of how the work actually gets done. May I use this flowchart image on my website?
Yes Caroline of course but please could you credit the image with a link to my blog and Facebook page:
ReplyDeletewww.ringorosesjewellery.co.uk
www.facebook.com.ringoroses
Thanks
Helen